Contact Us Live Chat or 1-888-958-2959
My Garage
My Account
Cart
Make sure this part fits

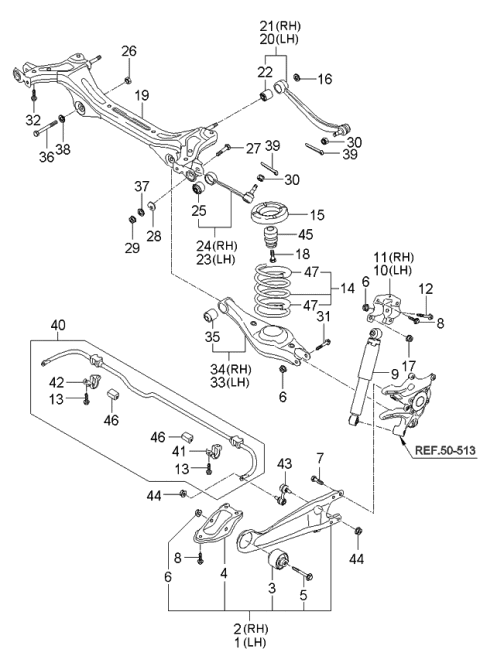
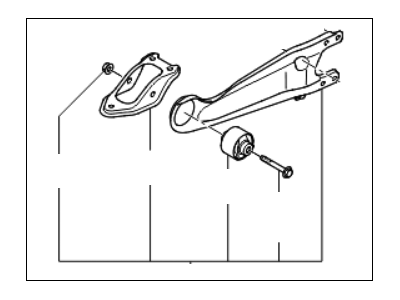
Kia 551004D200 Arm Complete-Trailing,L

2006-2014 Kia Sedona

Customer Questions & Expert Answers (2)
Kia 551004D200 Arm Complete-Trailing,L
  • Part Description
    Arm Complete-Trailing,LH
  • Part Code
    55500C
  • Position
    Driver Side
  • Replaced By
    551004D000
  • Manufacturer
    Kia
Make sure this part fits
$215.73 MSRP: $295.20
You Save: $79.47 (27%)
Ships in 1-3 Business Days
1
ADD TO CART
  • Related Parts
  • Product Specifications
  • Vehicle Fitment
  • Customer Questions & Expert Answers
  • Product Specifications

    BrandGenuine Kia
    Part Code55500C
    Manufacturer Part Number551004D200
    Part DescriptionArm Complete-Trailing,LH
    Item Weight8.40 Pounds
    PositionDriver Side
    ConditionNew
    Fitment TypeDirect Replacement
    ManufacturerKia
    SKU551004D200
    WarrantyThis genuine Kia part is guaranteed by Kia's factory warranty.
    Shipping & ReturnShipping Policy Return Policy
    Warning: California’s Proposition 65
  • Vehicle Fitment

    Year Make Model Trim & Engine Important vehicle option details
    2006-2014 Kia SedonaHigh Grade, Middle Grade|3.5L - Lambda 2, 3.8L, 3.8L - LambdaWagon Long - 7P, Wagon Long 7, Wagon Short - 7P, Wagon Short 7
  • Customer Questions & Expert Answers

    Q:
    Is this the correct part? Posted by KiaPartsNow Specialist
    A:
    You can Select Your Vehicle to check if 551004D200 fits your vehicle.
    Posted by KiaPartsNow Specialist
    Q:
    How to remove and install rear Axle Beam,Control Arm and Trailing Arm in Kia Sedona? Posted by Customer
    A:
    Rear axle beam is standard only if the truck model is 2005 and prior. Relax the nuts on the rear wheel, and lift the rear part of the car using jack stands placing them under the unibody frame rails. Lift the rear of the car and, using a floor jack, position it so that it is supporting the rear axle beam nearest the arm you are going to take off. Remove the rear stabilizer bar link bolt being you from the front of the trailing arm and then unbolt the nuts and pivot bolts attaching the trailing arm and take it out. Examine the bushings which often wears out and degrades with time and if that is the case then one need to take the arm to an automotive machine shop so that the worn bushings are pulled out and brand new bushings inserted. Installation is the direct opposite of the removal process, and all the bolts and nuts are usually tightened to the applied torque. When fitting any rear suspension arm, slacken all bolts, set up the rear suspension at normal ride height and-align the arm, then finally torque up the bolts. Regarding the upper arm or Panhard rod, place the rear axle beam on a jack, remove the nuts and pivot bolts and examine the bushings. These modules should also be installed following the same procedure that was followed earlier. At the axle beam, first, take off the rear drum brake assemblies and then disconnect the brake hydraulic fluid line fitting followed by lowering the beam with the aid of the floor jack. For the vehicles produced after 2006, the procedure is also very similar to the situations described above, due to the fact that the owner has to loosen the rear wheel lug nuts, then lift the car and finally put off the rear wheel. Here on the upper control arm you should remove the rear brake caliper and disconnect the upper control arm from the subframe and inspect the bushing and Ball joint for wearing. Installation on the other hand is a process that is the reverse of removal; every fastener must be tightened always to the correct torque. To reach the lower control arm you then have to take off the coil spring then detach the arm from the subframe to check how the bushing has worn out. The procedure of installation remains the same, though after its completion, there is a check for rear wheel alignment. For the lateral control arm, place the lower control arm on a lift, mark the position of the cam washer and follow the procedures of removal and installation while being very keen on the alignment. As for the trailing arm, support the rear suspension, cancel the stabilizer bar link, take out the bolts fixing the trailing arm and check the condition of the bush in question for weariness. Removal is the exact opposite of installation, making certain to loosen, then tighten all suspension fasteners and lug nuts to the recommended torque, do not adjust the nut/bolt on the trailing arm to bracket pivot until the lower control arm has been mock raised to normal ride height.
    Posted by KiaPartsNow Specialist
    If you have any questions about this product, please don't hesitate to ask us. We will be happy to help you!

Genuine Kia Part 551004D200, the Right Choice

To ensure reliability, purchase Kia part # 551004D200 Arm Complete-Trailing,L. It is sometimes referred to as Kia Trailing Arm. OEM parts are the best in terms of quality. They are made following Kia's official factory standards to ensure their durability and fit. These parts go through rigorous quality control tests to minimize any flaws or imperfections. This part fits 2006-2014 Kia Sedona.

KiaPartsNow.com is a leading supplier of genuine Kia parts and accessories such as Kia 551004D200 Arm Complete-Trailing,L. Should you require any OEM Kia parts, our website should be your go-to destination. We boast an extensive selection of genuine Kia parts, offered at prices that outshine even the most affordable aftermarket alternatives. Plus, our easy return policy and rapid delivery service are designed to provide you with the most satisfying shopping experience possible.

Why choose Kia Parts Now

  • Dedicated Service

    Your complete satisfaction is our #1 goal

  • Lowest Prices

    Best deals on genuine OE parts from dealerships

  • Fast Delivery

    Orders are processed and delivered promptly