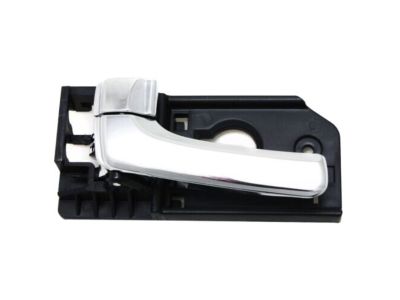
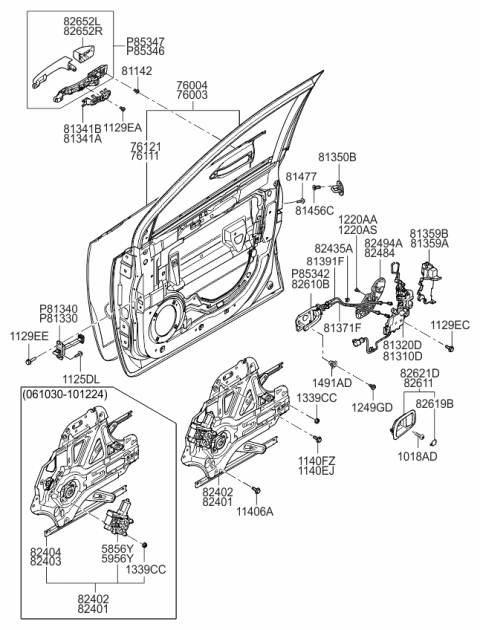
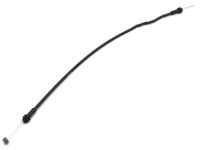
To replace the front door module, lower the window a quarter of the way and tape it in place, then remove the door trim panel. If the glass cannot be moved, remove the power window motor and lower the glass by hand, taping it in place to prevent it from falling. Disconnect the cable from the negative battery terminal and remove the door water shield by carefully peeling it back. Remove the inside door handle and the door latch mounting bolts, followed by the door speaker. Disconnect the window glass from the window regulator, then remove the lock cylinder shield fasteners and shield if equipped. Disconnect the lock rod and outside door handle rod by prying the retaining clips outwards, then rotate the clips up and pull the rods out of the handle. Disconnect the electrical connectors, disengage the harness retainers, and remove the harness from the module. Remove the door module fasteners and pull the module away from the door to release the retaining tabs, then maneuver the module with the latch assembly from the door. Installation is the reverse of removal. For the front door latch, remove the front door module, then remove the door latch-to-door module fasteners and lift the latch off the stud. Installation is the reverse of removal. To replace the inside door handle, remove the door trim panel and the water shield, then remove the inside door handle fastener and separate the handle from the door module. Rotate the handle and pull the cables from the handle, then disconnect the cables. Installation is the reverse of removal. For the front door outside handle, close the window completely and remove the front door trim panel, then remove the water shield. Disconnect the electrical connector to the lock, remove the lock cylinder shield fasteners and shield if equipped, and disconnect the lock rod and outside door handle rod. Loosen the outside handle mounting bolts and remove the outside handle support bracket, then remove the bolt holding the outside door handle to the door outer panel. From inside the door, remove the bolts holding the outside door handle and remove the handle assembly from the door. Installation is the reverse of removal. To replace the front door lock cylinder, remove the front door outside handle and pull the lock from the door handle, then install the lock cylinder into the door handle. The remainder of installation is the reverse of removal. For the sliding door actuator/module, disconnect the cable from the negative battery terminal, remove the sliding door trim panel and weather shield, disconnect the cables to the actuator, remove the door actuator/module fasteners, and lower the module. Disconnect the lock cable from the outside door handle and maneuver the module with the latch assembly from the door. Installation is the reverse of removal. For the sliding door latch, remove the sliding door trim panel and weather shield, open the sliding door halfway, remove the latch mounting screws, and lower the latch from the end of the door. Disconnect the external cable from the door and actuator/module, then reach inside the door and remove the latch with cable from the vehicle. Installation is the reverse of removal. To replace the sliding door outside handle, remove the sliding door trim panel, remove the actuator/module, and release the cable from the outside door handle. Remove the access plug for the outside handle retaining bolt and the bolt, then remove the bolts holding the outside door handle to the door outer panel. Remove the outside handle support bracket and pull the handle outwards to remove it. Installation is the reverse of removal. For the sliding door initialization procedure, remove the memory fuse from the interior fuse box, wait one minute, then reinstall the fuse and start the door initialization procedure. Manually close the sliding door ensuring it is latched, power the sliding door to the fully open position, then power the door closed from the fully open position to the fully closed position, and finally power the door open to the fully open position. To replace the liftgate latch, disconnect the cable from the negative battery terminal, remove the liftgate trim panels, and if the liftgate is stuck closed, pry the access panel out from the liftgate trim panel and rotate the release lever up. Disconnect the handle rod and the electrical connector to the latch, then remove the screws holding the latch to the liftgate and remove it from the vehicle. Remove the latch assembly from the liftgate and disconnect the cable and electrical connector. Installation is the reverse of removal. For the liftgate outside handle, remove the liftgate trim panels, disconnect the electrical connectors for the liftgate outside handle if equipped, and remove the liftgate exterior trim panel two outside mounting screws. Remove the two outside and two inside handle mounting screws, then remove the liftgate exterior trim panel out and disconnect the electrical connectors to the lights. Remove the handle from the vehicle. Installation is the reverse of removal. To replace the liftgate lock/actuator assembly, remove the liftgate trim panels, disengage the outside handle rod, actuator rod, key cylinder lock rod, and disconnect the electrical connector. Remove the actuator mounting nuts and remove the actuator assembly from the liftgate. Installation is the reverse of removal. For the key lock, remove the liftgate trim panels and the liftgate exterior trim panel, disengage the lock rod and disconnect the electrical connector, then remove the key lock from the liftgate. Installation is the reverse of removal.
Posted by KiaPartsNow Specialist 
