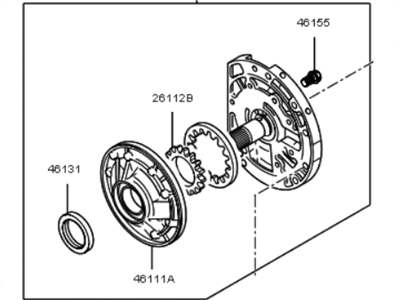
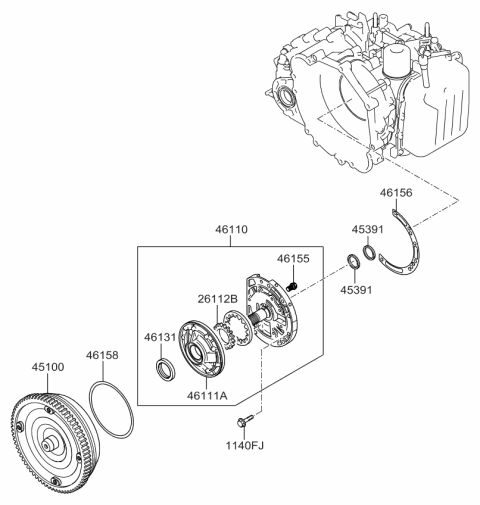
If the above-mentioned lettering refers only to the replacement of the front oil seal whereby neither the oil pump was removed or investigated, then the front oil seal may be replaced without the removal of the oil pump. For the wider range of engines, the removal should be initiated with timing belt and crankshaft sprocket next to the oil pump, changing their positions and thus removing the mounting bolts of the pump to separate it from the engine block. Loosen the front cover gently and put the oil pump on a working table and observe the seating of the oil seal. In doing the same, one should use a seal removal tool or a protected screwdriver, with an aim of avoiding to scratch the housing bore. Bolt on the oil pump cover and check for distortion by the removal of screws Besides, the removal of oil pressure relief valve also requires its direction to be marked before the inner and outer rotors can be removed. Replace the rotors back and take clearance measurements for the spring of oil pressure relief; further, the working surface of the pump housing should also be clean and free of oil. Slightly apply lubricant to a new oil seal's outside circumference, push it well into its position, and put grease on the relief valve rod before replacing it. Next step is to pack the pump cavities with the Petroleum jelly and fit the cover in proper position then tighten the screws. In this situation, it is preferable to promptly examine the oil pan screen for traces of contamination. Remove old gasket debris from the external faces of the pump and the engine block, fit the oil pump and use a new gasket on the pump to the engine block, and fasten the mounting screws. Replace other remaining sections in a backward manner, pour oil, switch on the engine and check for pressure and oil stains. First, for the 2.0L DOHC engine, remove the timing belt cover, timing belt, and crankshaft drive sprocket besides the oil pan and the oil pump pick-up tube bolts to release the pick-up tube. Check the crankshaft front oil seal and if it is leaking, replace it with a new one, then withdraw the bolts for attaching the oil pump gasket and the assembly of the oil pump separately. It is recommended to clean the pump assembly, next loosen and remove the bolts that are used to hold the cover and finally remove the cover. It is imperative to notice the mating marks on the rotors before handing them, and disassemble the relief spring and the plunger. When replacing crankshaft front oil seal it is advisable to optimize the procedure as follows: Remove the old seal by using a suitable bar or a screwdriver to avoid damaging the bore. Clean all the parts, measure the condition of the pick-up tube filter screen and confirm if it is blocked or torn. Check the front case for crack and check the clearances for the rotors and change the pump if the clearances are beyond the limit. Check the free height of the pressure relief spring and check that the plunger floats; replace if the specified limit has been reached. When bringing the two halves together, make sure the crankcase is clean, fit a new crankshaft front oil seal if you have taken it out and fit the relief valve parts. Apply clean engine oil on the rotors, properly position the mating surfaces of the rotors and cover, and fix the bolts. Scrub the gasket mating surface on the block, stock and fit a new gasket for the pump and the pump assembly while tightening the bolts of the retainer. Fit the oil pump pick-up tube assembly and fasten the bolts and then the oil pan is to be fitted. Last, put the crankshaft timing belt sprocket, timing belt and timing belt cover; put some oil, start the engine, check for oil pressure and leaks and check the engine oil after switching off the engine.
Posted by KiaPartsNow Specialist 


