- Live Chat
- 1-888-958-2959

Why choose KiaPartsNow
- Economical Prices
No matter which type of Kia Optima you have, it is true that you get a lot for your money when you buy genuine Kia Optima auto parts and accessories from KiaPartsNow.com. We are your prime online source for discounted prices. We offer high-quality options for your vehicle at unbeatable prices that can't be found anywhere else.
- Exemplary Service
KiaPartsNow.com is the leader in dedicated service for online parts ordering. We offer our customers technical support via telephone, online chat support, and by email. Our team of highly skilled experts work endlessly to make your shopping experience simple and trouble-free.
- Expedited Shipping
We have several reliable distribution centers strategically located throughout the United States. This gives you quick access to our discounted genuine Kia Optima parts and accessories when you need them. We offer our customers the convenience of having Kia Optima parts expedited directly to their doors.
Popular Genuine Kia Optima Parts
- Engine Parts View More >
- Trim Parts View More >
- Chassis Parts View More >
- Electrical Parts View More >
- Transmission Parts View More >
- Body Parts View More >
Shop Genuine Kia Optima Parts with KiaPartsNow.com
The Kia Optima, a mid-size car in production since 2000, is known by various names globally, including the Kia Magentis in Europe and Canada. Over time, Kia retained the Optima name in the US, Canada, and Malaysia, but switched to the Lotze designation in the South Korean market and Magentis for other worldwide sales. From the 2019 model year, coinciding with the fifth-generation release, the Optima name is used globally. The car's design evolved over time, with minor updates in 2002 and significant redesigns in 2004, 2008, and 2010. South Korea even saw the introduction of a more luxurious variant called the Regal. The 2008 redesign saw aesthetic changes to the headlights and taillights, an increase in length, and a revamped interior and engine. In 2010, Optima added a one-touch start system with a proximity key, with the SX models getting paddle shifters. The third-generation Optima, known as the Kia K5 in South Korea and China, debuted at the 2010 New York Auto Show with a sportier silhouette designed by new chief designer Peter Schreyer. This generation incorporated the new Tigrin grille and was equipped with features such as a panoramic roof, heated and cooled front seats, heated rear seats, a navigation system, and paddle shifters. It epitomized a combination of luxury, performance, and innovative design, offering consumers a compelling choice in the mid-size car market.
Over time, the Kia Optima may experience wear and tear leading to potential issues, such as engine failure, characterized by starting issues, intermittent stalling or sputtering at high speed, squealing noises, decreased engine performance like power loss during acceleration and decreased fuel efficiency. If the Check Engine Light activates, it's advisable to inspect the crankshaft, fuel pump, drive belt, rod bearing, and air filter. Another common issue is braking system failure, marked by noisy brakes, excessive vibration on the brake pedals, and marks on the brake rotors. Poor brake response can also indicate a need to check the Optima brake disc and brake pad set. Particular attention should be paid to more vulnerable components such as the headlights, which are crucial in poor light or adverse weather conditions. The antenna, responsible for transmitting important information, and the cabin air filter, which maintains air quality within the vehicle, should also be routinely checked. Lastly, electrical parts like the ignition switch, fog light, and door jamb switch require at least annual maintenance to ensure optimal operation of the Kia Optima.
OEM components are subjected to rigorous quality control assessments, ensuring their superior quality and resilience. Each OEM Kia Optima part we offer is competitively priced and comes with the assurance of the manufacturer's warranty. Furthermore, we guarantee the quickest delivery of your orders right to your doorstep. Our hassle-free return policy is also in place for your peace of mind.
Kia Optima Parts Questions & Answers
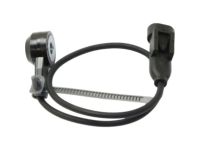
- Q: How to remove and install knock sensors in Kia Optima?A: The knock sensor in four-cylinder and 2001-2006 V6 models is on the engine block's front side. To remove, disconnect the negative battery terminal and the sensor's electrical connector, then unscrew the mounting bolt. For 2006.5 and later V6 models, the sensors are between the cylinder heads, requiring intake manifold removal. Disconnect the negative battery terminal, remove the intake manifolds, disconnect the sensor's electrical connectors, remove the wiring harness retainers from the engine block, unscrew the mounting bolts, and remove the sensors. Installation is the reverse of removal.
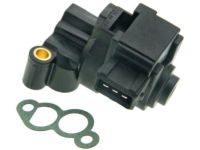
- Q: What is the location and removal process for the IAC valve on Kia Optima?A: First of all, the Idle Control Valve, used on 2001-2006 engines, is found under the throttle body on four-cylinder engines and beside the throttle body on V6 engines. To remove, disconnect the negative battery terminal cable, remove the throttle body on four-cylinder engines, disconnect the Idle Control Valve's electrical connector, and remove the valve and old gasket. Installation is the reverse of removal, using a new gasket and securely tightening the valve's mounting fasteners.
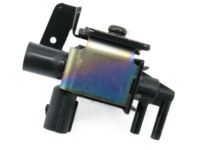
- Q: How to replace the EGR Vacuum Solenoid,EGR Valve and MAP Sensor in Kia Optima?A: The EGR system, used in 2001-2006 four-cylinder models, lessens NOx emissions. Also, to replace the EGR valve, remove the engine cover, disconnect the vacuum hose, remove bolts, and lift the valve. Check for carbon deposits and clean or replace them. For the EGR Vacuum Solenoid, disconnect the wiring and hoses, label, remove bolts, and remove the valve. The MAP sensor is connected to the intake manifold and informs the PCM. Disconnect the wiring/hose connections, remove screws, and lift the sensor. Installation is the reverse of removal.


