×
- Live Chat
- 1-888-958-2959

My Garage
My Account
Cart
Genuine Kia Sedona Timing Belt
Engine Timing Belt- Select Vehicle by Model
- Select Vehicle by VIN
Select Vehicle by Model
orMake
Model
Year
Select Vehicle by VIN
For the most accurate results, select vehicle by your VIN (Vehicle Identification Number).
1 Timing Belt found
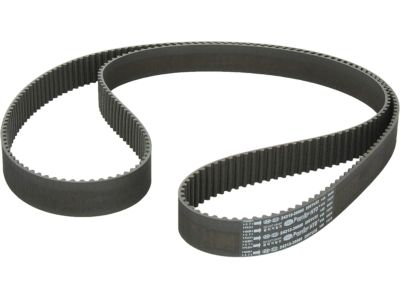
Kia Sedona Belt-Timing
Part Number: 2431239800$75.44 MSRP: $107.00You Save: $31.56 (30%)Ships in 1-3 Business Days
Kia Sedona Timing Belt
If you're in search of top-notch, reasonably priced OEM Kia Sedona Timing Belt, then you've found the perfect spot. Our website boasts an extensive inventory of Kia Sedona Timing Belt, all priced at the market's premier price. Rest assured, every genuine part we offer comes with a warranty straight from the manufacturer.
Kia Sedona Timing Belt Parts Questions & Experts Answers
- Q: How to remove and install the Timing Belt and Sprocket on 2005 and earlier Kia Sedona?A: Typically the timing system is slightly more intricate, and in the event of a mistake the outcome could lead to severe damages in the engine thereby the procedures should be handled by expert people. Take off the negative terminal of the battery cable, then the engine cover, turn on the parking brake and then raise the front end of the automobile with the aid of jackstands and block the rear wheels. Take off the drivebelt and tensioner, and then the Crankshaft Pulley and the power steering pump respectively. Loosen all the fasteners on the timing belt cover and remove the cover, then stand the engine on a jack and place a block of wood on the oil pan. Disconnect the right side engine mount and the bracket; replace the crankshaft sprocket but don't use the bolt; set the engine to TDC for number one cylinder with all timing marks lined up. Lock the cam sprockets so that they will not spin and if you are reusing the belt, align the marks on the belt for ease of putting the belt at the correct direction. While holding the hex part of the camshaft, take off the tensioner and timing belt, and, if needed, the camshaft sprockets. There is a need to examine the belt for signs of oil, dirt and the general appearance that will show whether there is any damage or not, check on the tensioner for signs of oil leakage and check the idler pulleys to make sure that they rotate smoothly. Wipe the timing belt clean, set the camshaft sprocket in the proper position placing the pin hole over the pin, and then tighten the sprocket bolt to the recommended amount of pound-inches. Overlapping the appropriate marks on all camshaft sprockets with the comparable engine marks, replacing all the respective sprockets and pulleys, he also checks to ensure that the engine is still at TDC. The crankshaft sprocket with the spacer has to be installed at first along with the camshaft marks, then the timing belt tensioner pushrod has to be slowly compressed and a pin should be inserted into that area. Position the timing belt over the sprockets and pulleys in the proper configuration; then, using a wrench and the amount of force described above, turn the tensioner pulley clockwise. Screw back the crankshaft pulley, ensure all the marks coincide and remove the pin in the tensioner. SLOWLY rotate the crankshaft through two complete revolutions to re-align the timing marks.If there is any feeling of friction,stop turning the crankshaft as this may cause the valves to impact on the pistons. If the timing marks are not lined up, follow the procedures outlined before, putting the timing belt correctly in place to avoid severe damage to the engine. To recheck the protrusion of the tensioner rod, after allowing the engine to idle at TDC for 5 minutes, and if measurements are different or the part is damaged, it is necessary to replace the tensioner. The rest of removal is done in an opposite sequence of the installation process.


